
First experience.
I woke up early one Tuesday morning and pushed the bike to a nearby parking lot to try and ride.I had taken the toolkit along as well, to fix any last minute issues.
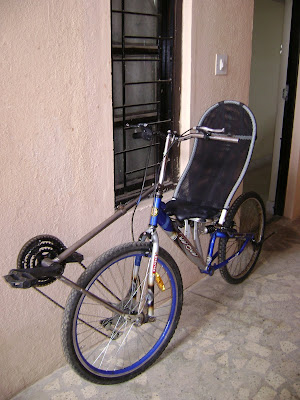
Finally, sitting on the bike was a great feeling. It had taken almost 7 months to get to the final form after bike frame changes, seat changes and lots of other redesigns. However, try as I could , I could not pedal even one revolution. I kept falling over, and I found it quite difficult to push the ground from that position to gain any momentum. Finally, the top tube just popped out from the force of my feet on the pedals and the retaining nut broke. I was gutted, and felt it not worth the effort of all these months. So I pushed the bike back home and thought about what to do next.
Turns out the problems were not so serious. A little welding and fixing later,I was back at the parking lot early on Wednesday morning . Having set up the gears this time to make it easy, I got my wife to hold the bike so I didn't fall .I set off and after a few tries, sure enough, I was off. It took me a while to figure out how to ride it, considering the hands need to balance out the power from the feet.
Since then , I've since learned to ride on roads as well. The hardest part is all the attention that the bike draws. I have gotten better at riding with a straight face as if its just another day at the office. As usual its kids that are most excited, however adults of all shapes and sizes give a goofy grin when they see it. This on the small bylanes, I wonder how its going to be on the main roads with traffic .
I wouldn't have gotten this far without help from lots of people. Balu for the seat fabrication, Muneer for the cycle alignment, Vijay who fabricated a whole new bottom bracket from scratch and of course my wife for the support and encouragement ,given that I turned the living room literally into a cycle workshop for the past few months.


Blender 4.5 LTS Released
1 hour ago

