
My first attempt was using a standard bottom bracket shell ,but the fabricator who I worked with seemed to think it was too complicated, hence I got it fabricated from scratch. Note that the cruzbike needs a pivot joint (and not a fixed chainstay ) .

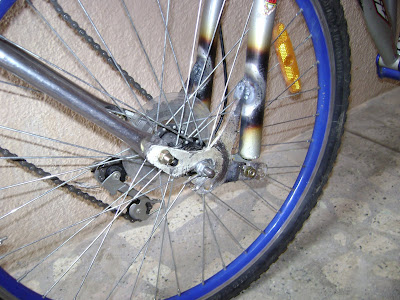
The next step was to cut a small triangle so that the wider rear hub can fit the front fork. It might make sense to try and widen the front fork as well. The shape was cut from steel plate and took many iterations to fit it right.
 |
| From cruzbike near... |
The triangle was welded to the front fork, which was turned backwards so that the trail is positive.
 |
| From cruzbike near... |
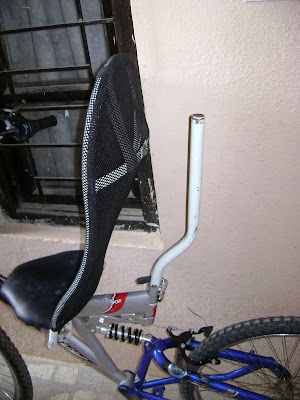
A bent rod was used where the seat post sits, to allow the seat to recline as required. For starters, a reasonably upright position would be a good bet as it allows the rider to put his feet down quickly.
 |
| From cruzbike near... |
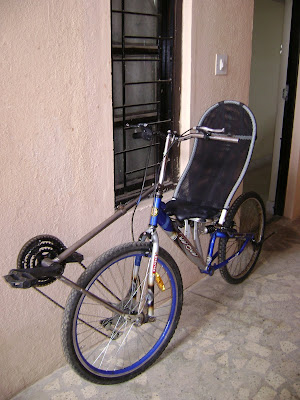
The seat
It was constructed out of bent lightweight tube, and sits on the top tube of the donor bike. The seat itself is plywood with foam, and the backrest is breathable nylon fabric.
 |
| From cruzbike near... |
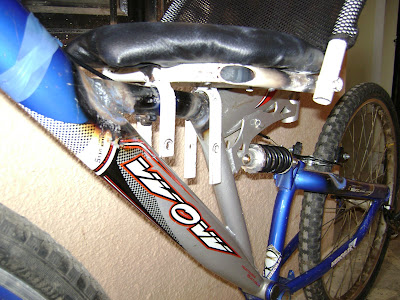
The tube attaching to the stem to the bottom bracket is telescoping just like a normal seat post. It allows adjustment for riders with different height.
 |
| From cruzbike near... |
The rear derailleur is attached the same way in the front. However, I still need to learn a bit more to fix the shifter for the chain rings.
 |
| From cruzbike near... |
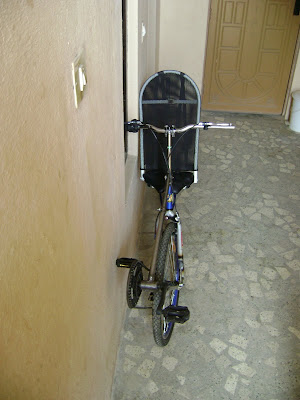
Pictures of the completed bike:
 |
| From cruzbike near... |


2 comments:
To begin with it looks nice and it seams you will be more comfortable with this position for a long drive hope to see you soon
@Iggy: Thanks, yes its pretty comfortable compared to a diamond frame bike.
Post a Comment